22. Export Your Data
22.1. Raw Data Export
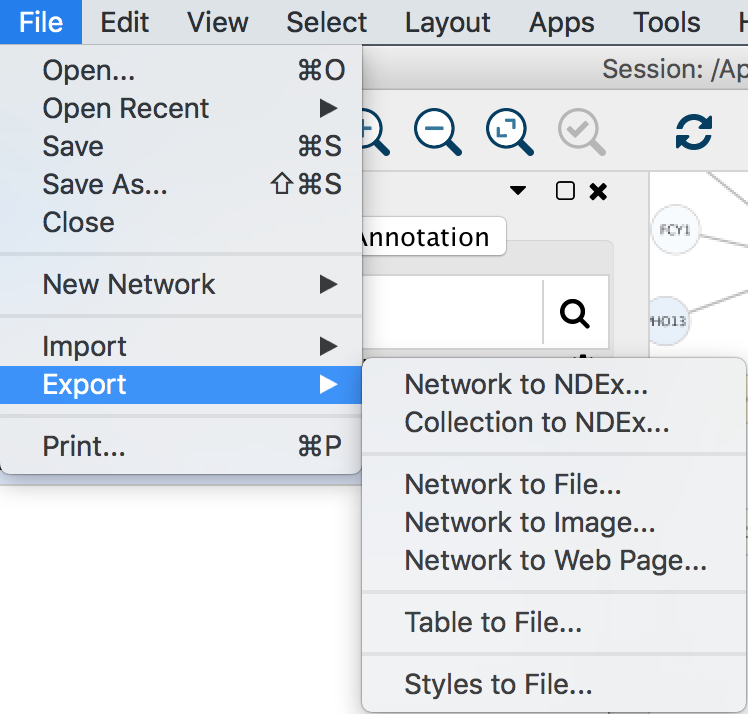
To use data from Cytoscape networks in an external application, the data has to be exported. As a Cytoscape network consists of a number of different types of data, there are options in Cytoscape for each exportable data type. These options (Network, Table, Styles) can be found on the File → Export submenu (shown above).
Network Data Exchange (NDEx) Public Database
The Network to NDEx and Collection to NDEx options are used to store a network on a public NDEx server. You can use an NDEx server as a cloud-based store for your networks, as a means of sharing networks with collaborators, or to archive networks for publication. To store a network, you must have an NDEx account, which you can create by visiting the NDEx Public Server website.
The Network to NDEx option saves only the currently selected network to your NDEx account. Such networks are suitable for processing by other applications and web services, as they contain only the nodes and edges in the selected network – other networks and the nodes and edges unique to them are not written. If you import this network (using the Cytoscape Search bar), only the single network will be loaded.
The Collection to NDEx option saves all networks in the collection containing the currently selected network. If you import this collection (using the Cytoscape Search bar), the entire collection will be loaded. This option is closest to saving an entire Cytoscape session, except that only the current collection is saved.
When you select either option, the CyNDEx-2 Browser dialog will appear and enable you to provide metadata that will be displayed during subsequent NDEx searches. To save a network, you must add an NDEx account profile to the CyNDEx-2 Browser (by filling out the profile form reachable by clicking on the Anonymous credential in the upper right), and then make it current.
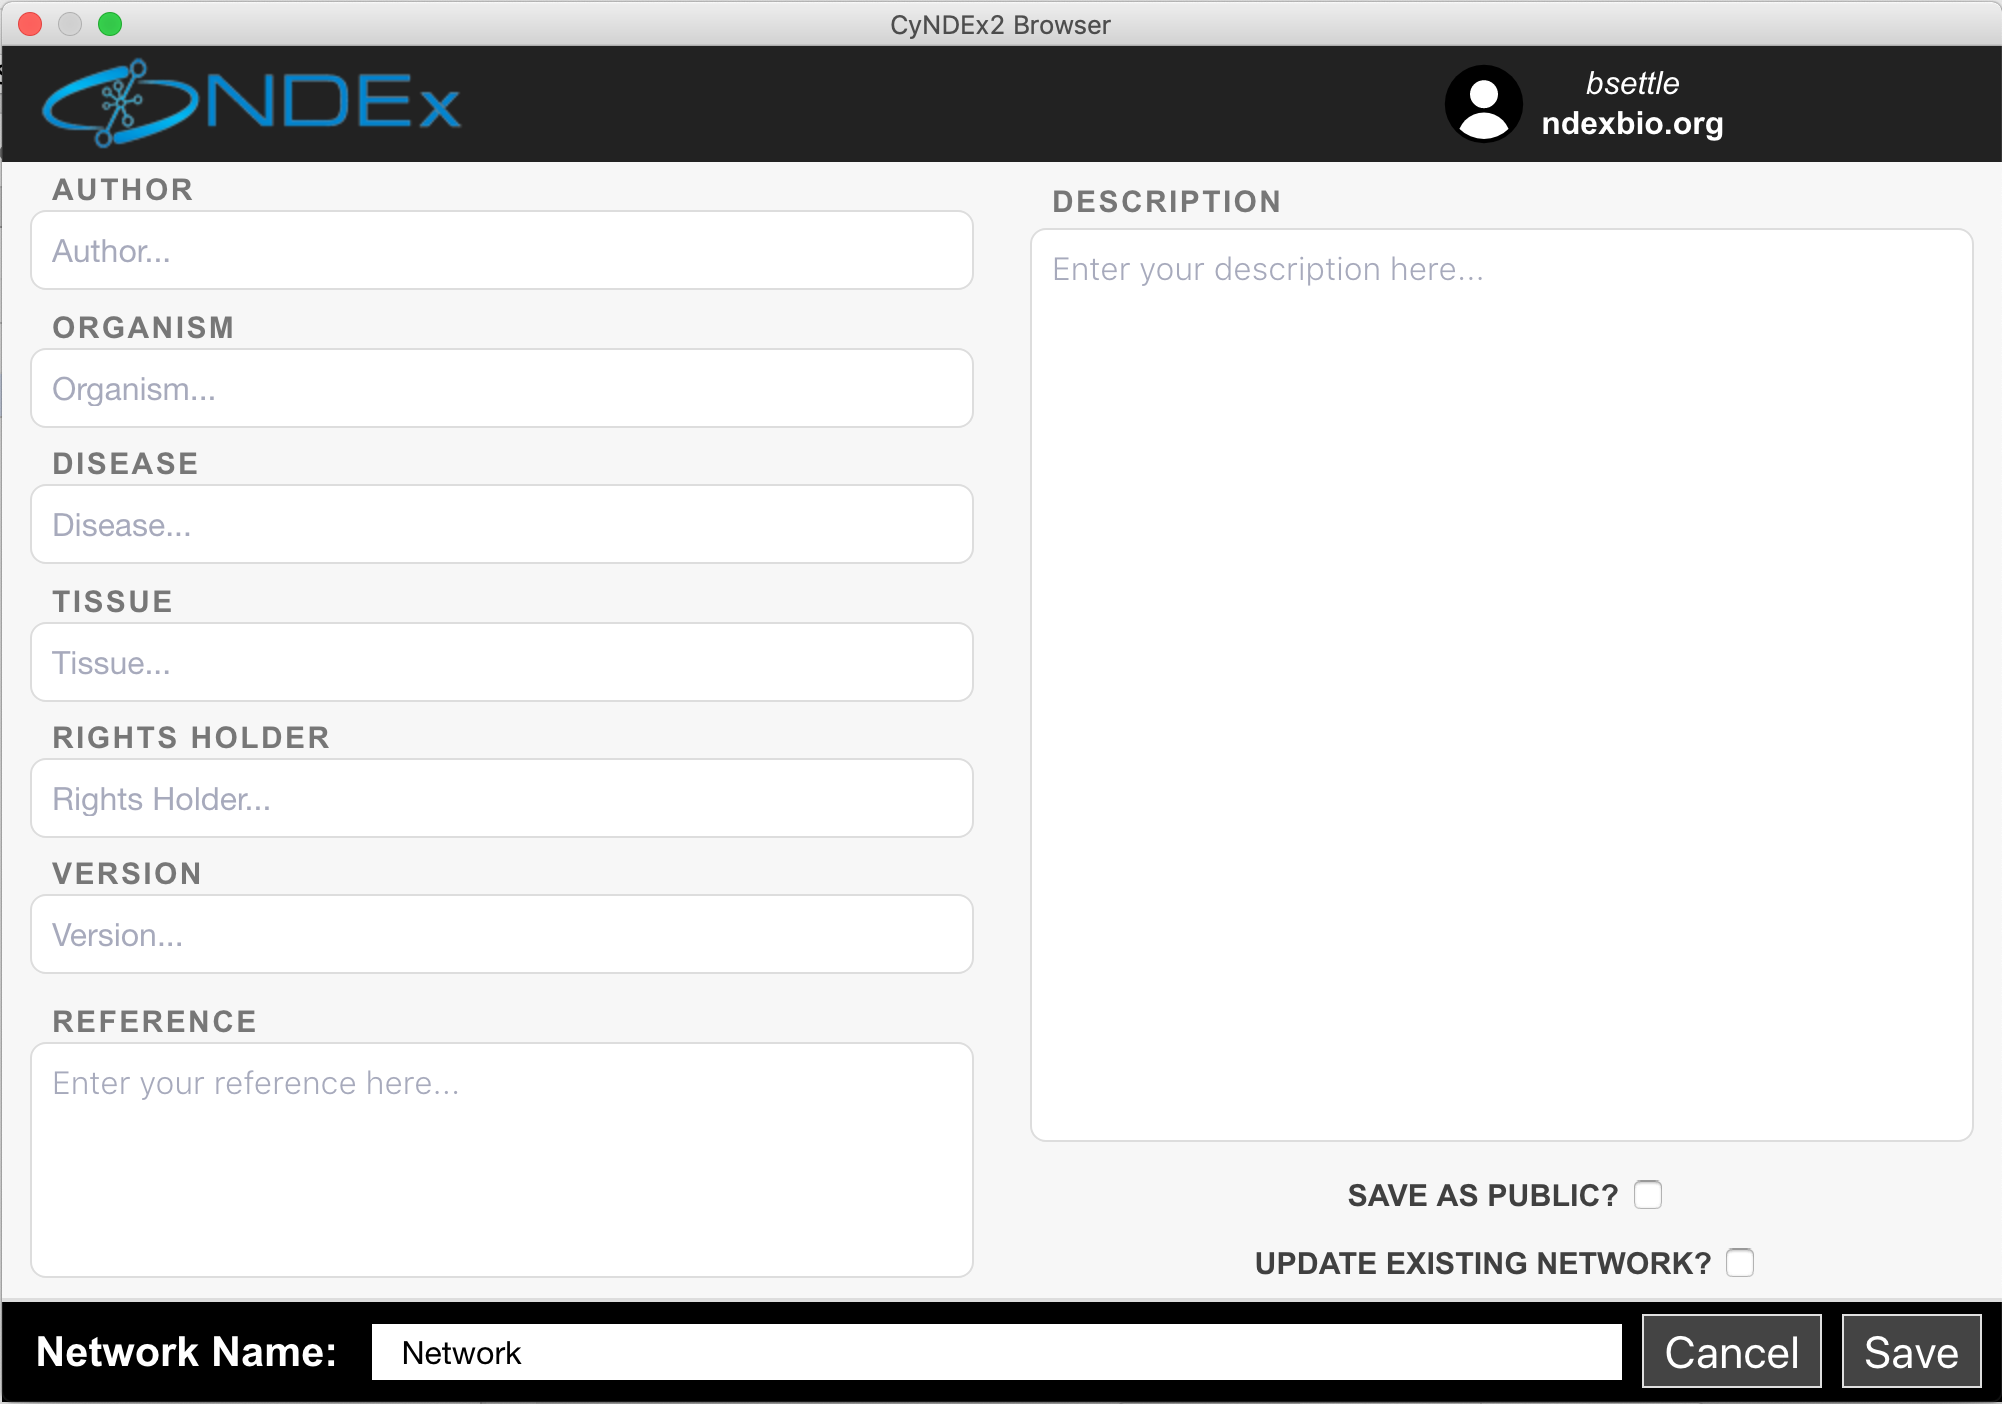
You can set the name of your network by editing the Network Name attribute at the bottom. The Update Existing Network option enables you to overwrite an existing NDEx network if you have permission. If you choose to make your network public, you must fill in the Version and Description attributes. Choose the Save as Public option to enable collaborators to load your network.
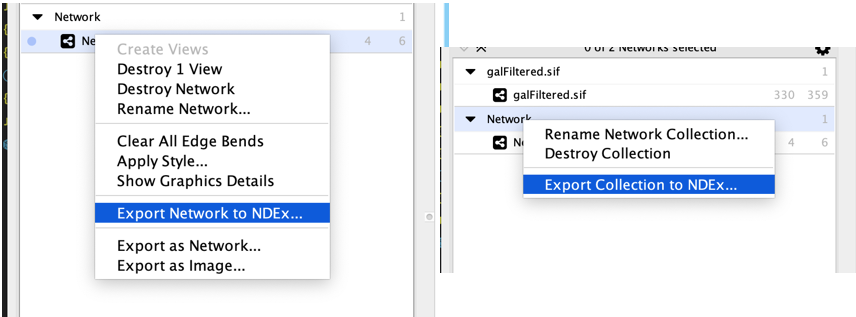
Menu actions have also been added to the network and collection context menus in the Cytoscape Network panel, as another method of accessing the network save dialog.
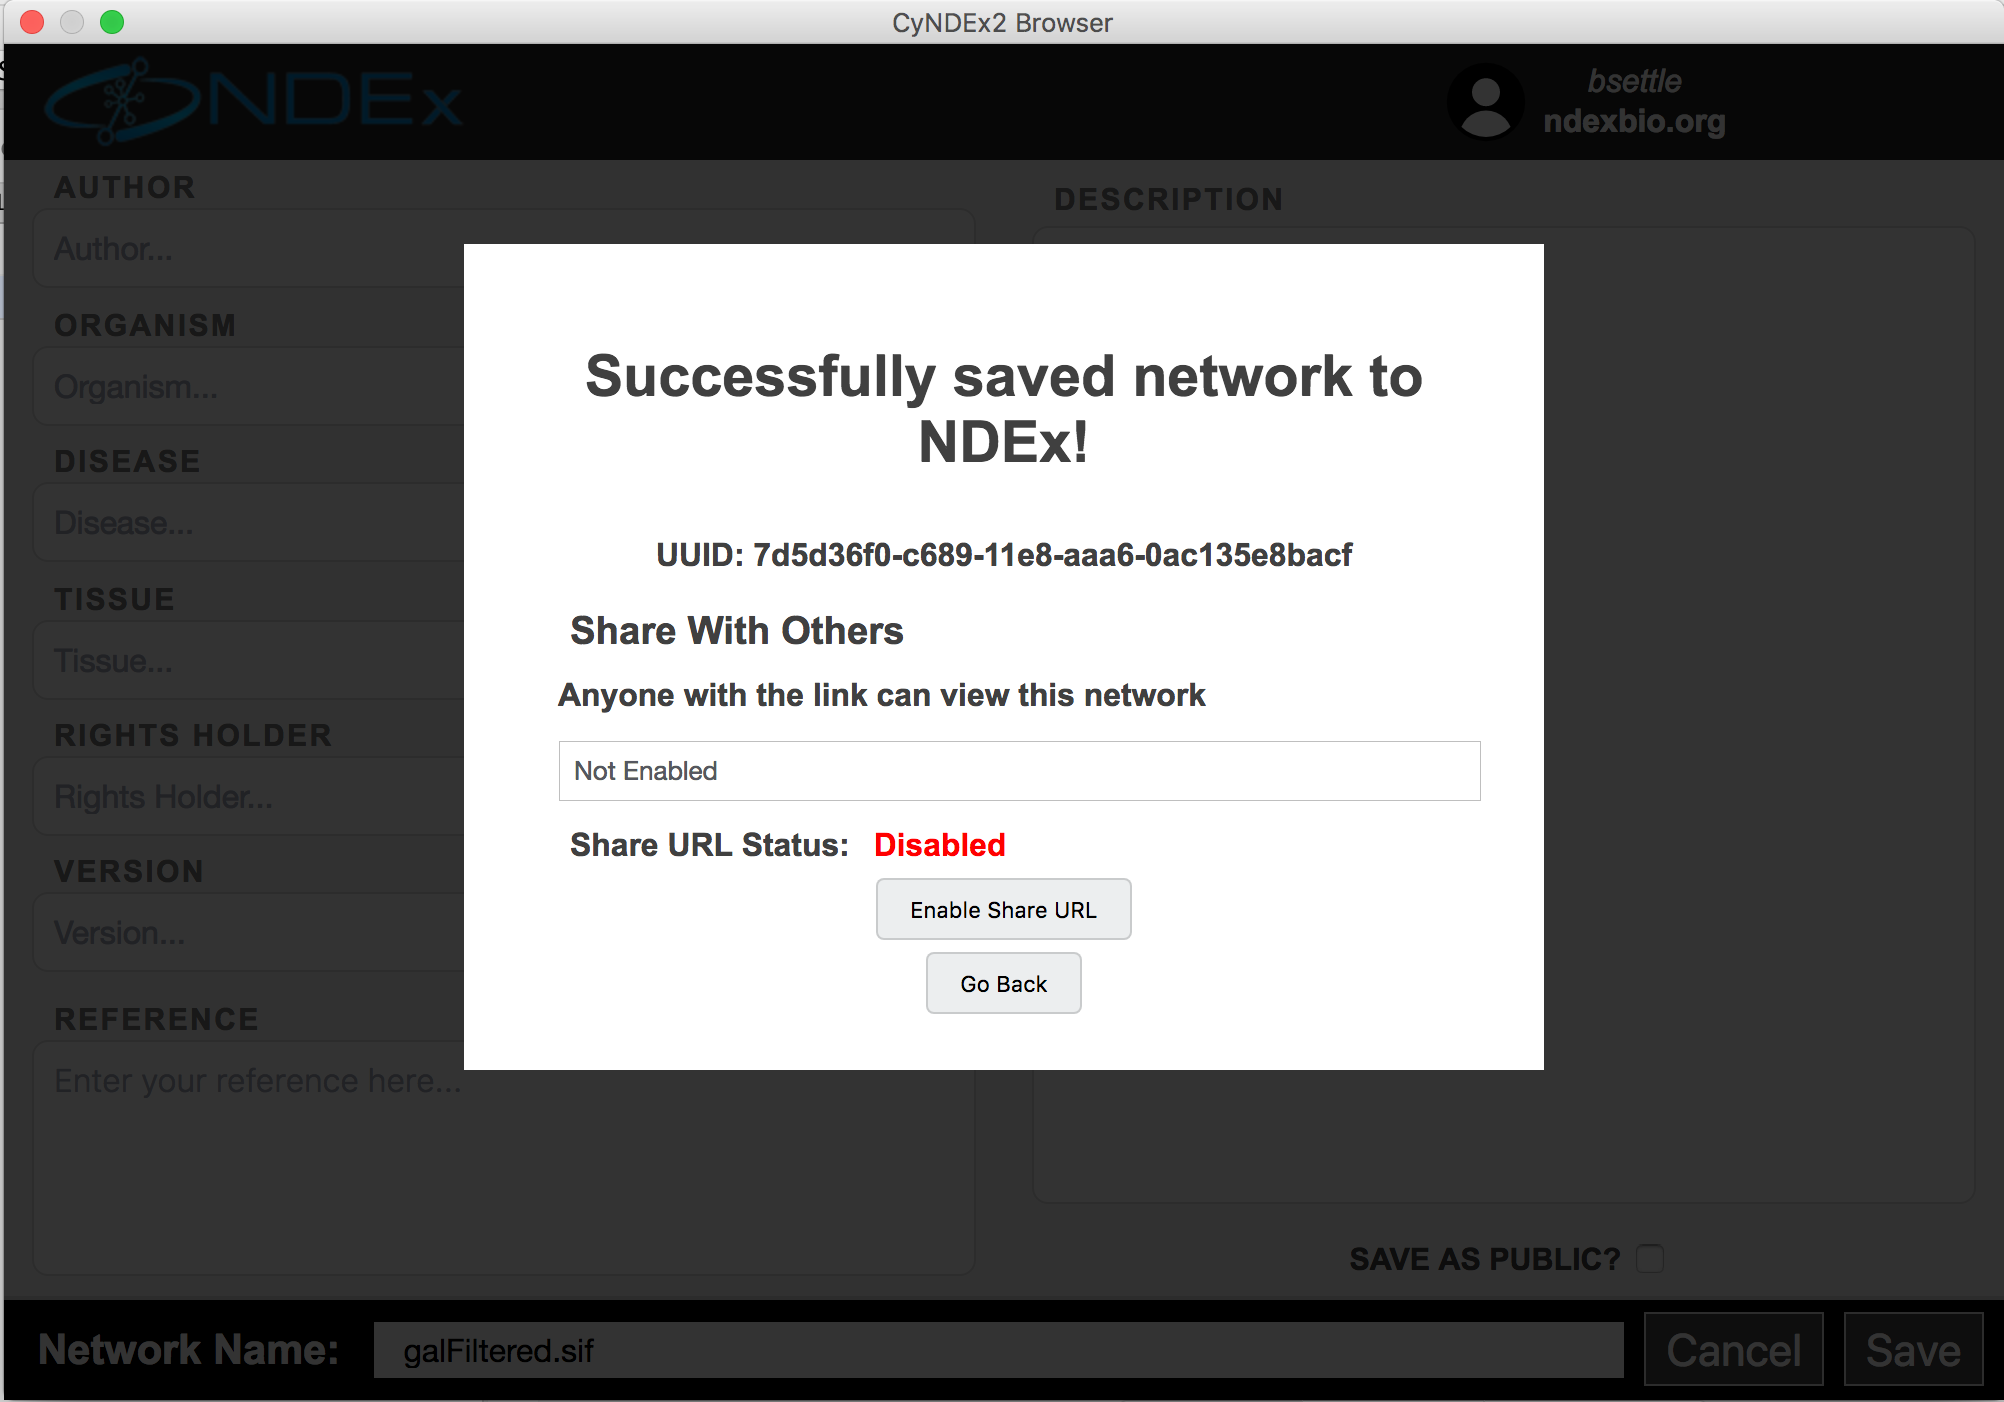
When the export to NDEx is complete, you will be given an opportunity to capture the network’s UUID in your clipboard. The UUID is suitable for e-mailing to colleagues so they can load your network via their Cytoscape Search bar (provided you selected the Save as Public option). For more sharing options, see the NDEx Public Server website.
Further information on NDEx is available at the NDEx Informational/Doc website.
Network
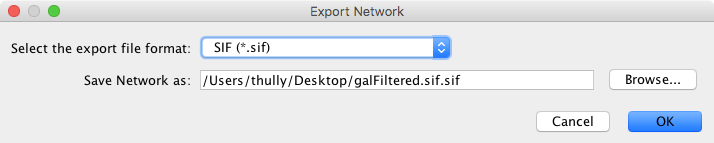
The Network option is used to export network data. Network data includes the nodes and edges in the network, and also will include data attributes and visual information if the chosen format supports it (like XGMML). Network data can be exported in a number of formats, including:
- SIF (Simple Interaction Format)
- NNF (Nested Network Format)
- XGMML
- GraphML
- PSI-MI Level 1 and 2.5
- Cytoscape.js JSON (can be used with Cytoscape.js, a tool described in future sections)
- CX JSON (for Cytoscape Cyberinfrastructure network exchange)
The default format is SIF, which is a simple tab-delimited network format that provides node names and edge interactions only. You can choose the format using the dialog drop-down box. A file name is automatically suggested based on the network name and selected format, with the file path defaulting to the current working directory. You can change the suggested file name/path using the text box or Browse button. Press OK to export with the selected options.
Table
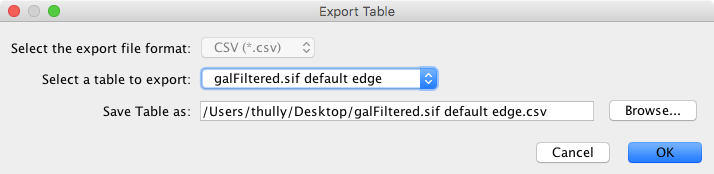
The Table option is used to export any of the data tables that are available in the current Cytoscape session. This includes the node, edge, and network tables that can be seen in the Table Browser, as well as any unassigned tables. The only currently supported file format currently for export is CSV (comma-separated value).
The export dialog for Table has only two selectable options - the table to export and the file name (file type is always CSV). A file name is suggested based on the name of the selected table with the path defaulting to the current working directory. As in Network, the suggested file name can be changed using the Browse button or the text field. Press OK to export the selected table with the given file name.
Styles
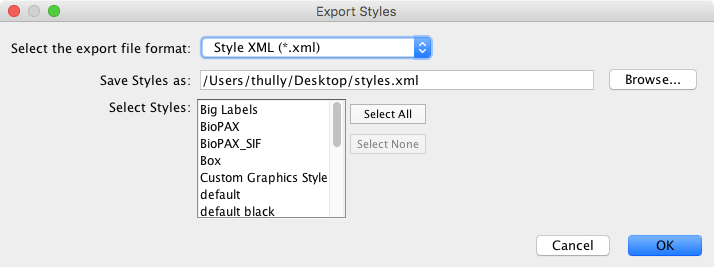
The Styles option is used to export one or more visual styles available in the current Cytoscape session. Supported formats include Style XML (which can be imported by 3.x versions of Cytoscape) or Cytoscape.js JSON (which can be used with Cytoscape.js, described in future sections).
Style export has three options - the export format (as described above), the style(s) to export, and the file name (a suggestion will be made based on the current directory and file type). As in Network → Table, the suggested file name can be changed using the Browse button or the text field. The list of styles is a multiple-selection list - one or more can be selected using Ctrl/Cmd-click (to select multiple discontiguous elements) or Shift-click (to select a contiguous element range). Press OK to export all selected styles with the given file path.
22.2. Exporting for Publication
When you finish your data analysis and visualization, you can publish your data to share the results. Cytoscape has several options to do this, with most options suitable for Cytoscape users and other options suitable for programmers wanting to create unusual or complex network viewers. These are further explained below.
- An NDEx network
- A session file
- A static image
- An interactive web application
- CyNetShare
- Full web application
- Simple network view (for web application developers)
As an NDEx Network
The easiest way to share your results with others is to save your network in the NDEx Public Database by using the Network to NDEx or Collection to NDEx options. When you save your network, you will receive a UUID (e.g., 50e3dff7-133e-11e6-a039-06603eb7f303) that you can e-mail to collaborators for use in their own Cytoscape Search bar (provided you exported using the Save as Public option – see the Save as Public option.)
NDEx also has options that enable you to:
- generate a DOI suitable for use in publications
- create an anonymous sharable link (similar to a Google Doc shared link)
- create interest groups and specific sharing within NDEx
For more information on NDEx publishing and sharing features, see the Publishing in NDEx and Sharing Networks in NDEx tutorials.
As a Session File
Another easy way to share your results with others is simply saving everything as a session file (which is a zipped session archive). You can save your current session by clicking the Save Session icon. You can save to a thumb drive, a shared file system, or even a cloud drive directory such as Dropbox. If you save to a shared drive, beware not to have two people work on the same session file with Cytoscape at the same time, as unpredictable results may occur.
As a Static Image

Cytoscape can generate publication-quality images from network views. By selecting File → Export as Image…, you can export the current network view into the following formats:
- JPG
- PNG
- PS (Post Script)
- SVG
The image export dialog has a variable number of options based on the file format selected, with file type and file name always being selectable. PNG and JPEG have options for scaling, while other formats only have a single option, Export Text as Font. The file name is suggested based on the name of the selected table with the path defaulting to the current working directory. As in raw data export, the suggested file name can be changed using the Browse button or the text field. Press OK to export an image with the given file name and parameters.
We recommend using PDF for publications because it is a standard vector graphics format, and it is easy to edit in other applications such as Adobe Illustrator.
Known Issues
For PDF export, there is an option to Export text as font. This option does not work for two-byte characters such as Chinese or Japanese. To avoid corrupted texts in the exported images, please uncheck this option when you publish networks including those non-English characters.
As an Interactive Web Application (New in 3.2.0)
The Web is an excellent platform for data sharing and collaboration, and Cytoscape provides a number of ways to publish your network on the web, with each choice representing tradeoffs between ease, simplicity, and customization options. All solutions leverage the cytoscape.js drawing library, and so enable not only viewing but also Cytoscape-style interactive browsing of networks and attributes.
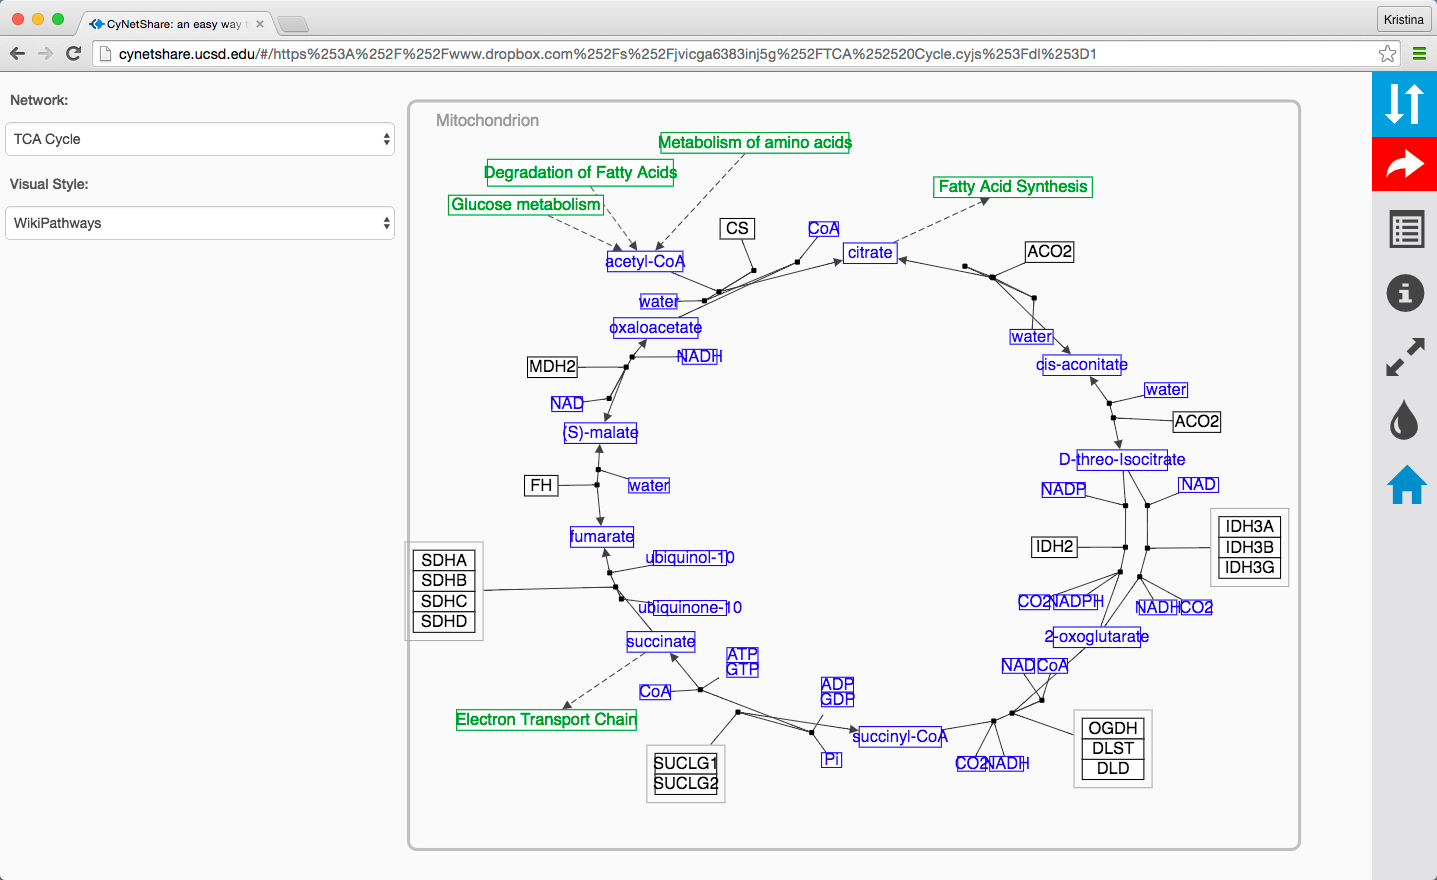
The simplest choice is CyNetShare, where you save your network (and optionally a style) on a public file system, then interactively view the network in a browser. Like Google Maps, you can generate and publish a URL that allows collaborators to also view your network.
Alternatively, Cytoscape can generate an entire web site showing a single page containing the viewer with your network pre-loaded. You can load this directly onto your own web server to become part of your web site.
Finally, Cytoscape can generate the skeleton of a web site for further customization by JavaScript programmers.
These features are available as Export menu items under the File menu, and are described in sections below.
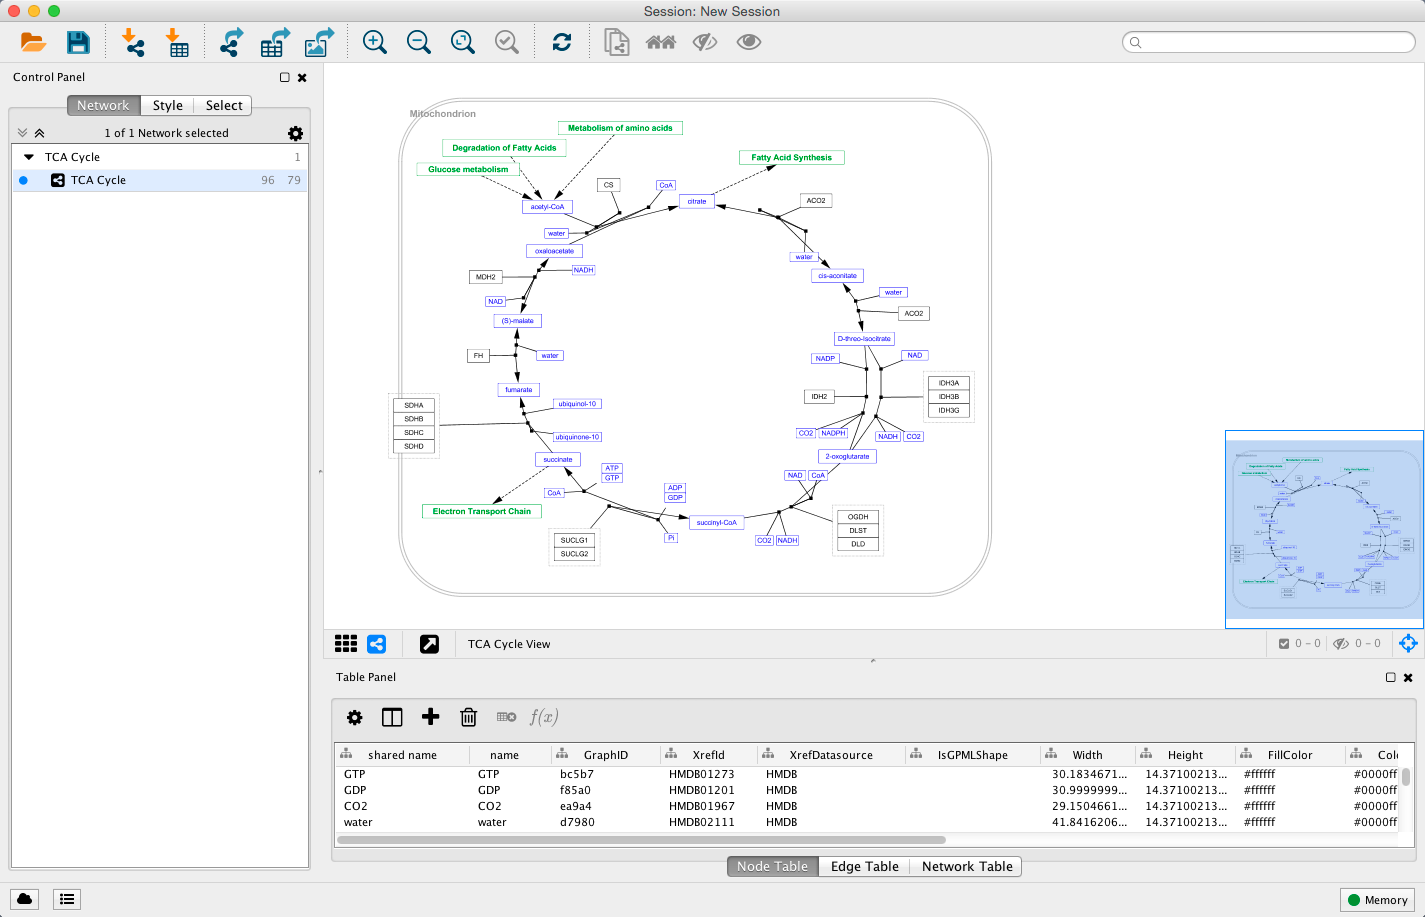
For example, here is a network in Cytoscape:
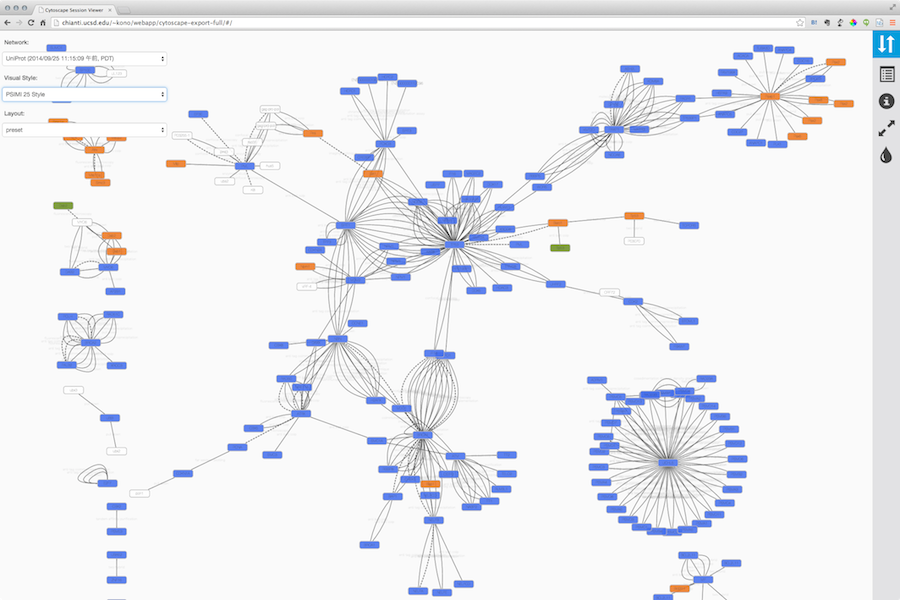
Here is the same network as an interactive web visualization:
Note that web browsers can render small networks (e.g., 1000 nodes) quickly and effectively, but attempting to render large ones (e.g., 5000 nodes) will take a very long time.
A word about exporting styles to interactive web applications: Our web applications are based on the cytoscape.js display library, which renders a subset of Cytoscape styles. For more information, see the Export Styles to Cytoscape.js section below.
Generating a Full Web Application
The full page export option is designed for users who want to publish their network as a complete single-page application. Cytoscape creates a zip archive containing a complete JavaScript-based web application that works as a basic viewer (like CyNetShare) for Cytoscape-generated network visualizations. You can unzip the archive onto a web server (or your PC) and view the network via a web browser on PCs and tablets.
To generate an entire web page for all networks in the session as a zip archive, select File → Export as Web Page…. The following dialog will appear:

This simple dialog has only two options - the file name and the type of web export (full, simple network view, or JSON). For full web application, we use the default. The file name is suggested based on the name of the selected table with the path defaulting to the current working directory. As in raw data export, the suggested file name can be changed using the Browse button or the text field. Press OK to export a web archive with the given file name.
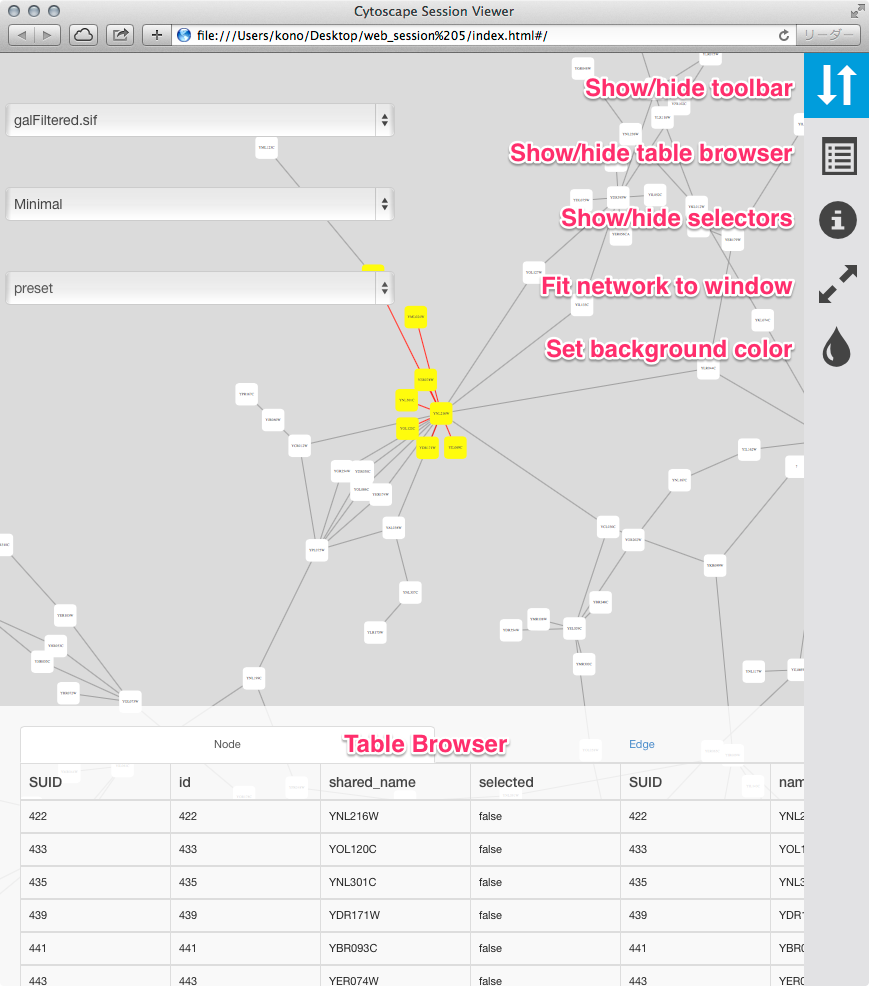
To view the web page, unzip the archive into a folder on your PC or web server. The folder will contain an index.html file, the network data, and other files. You can open the index.html file in your browser (usually from your browser’s File → Open menu item.)
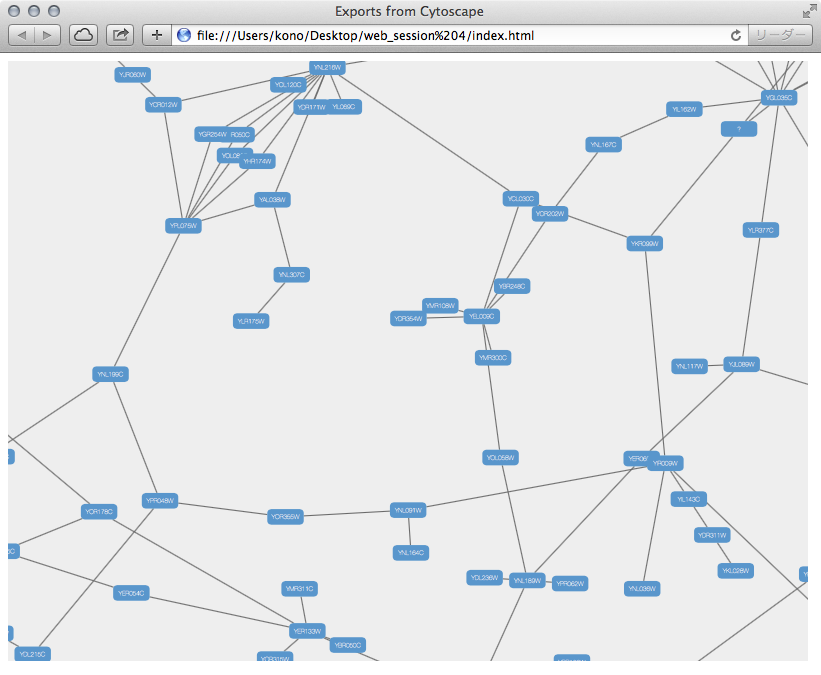
Here is an example exported file from Cytoscape:
Note that because Cytoscape uses the latest HTML5-based web technologies, it cannot support older or non-conformant web browsers such as Internet Explorer. We strongly recommend using the latest version of modern web browsers such as Google Chrome, Mozilla Firefox, or Apple Safari.
Generating a Simple Network View (For Web Application Developers)
The Simple Network View export option is designed for users who want to publish their data as a complete single-page application, but are interested in customizing the web viewer application themselves. Cytoscape creates a zip archive containing a partial JavaScript-based web application based on the cytoscape.js library and including simple “boilerplate” code and the current network view. The user can create a custom viewer by customizing this code.
To generate a web page for a single network view as a zip archive, select File → Export as Web Page … as before, but this time choose the Simple viewer for current network only format as below:

Everything else works as before, though this time the viewer will only include the current network. Press OK to proceed with the export.
For instructions on testing the customized web application, see Generating a Full Web Application above.
Extending the webpage with Cytoscape.JS functionality
As of version 3.6.2 of the JSON Support core app in Cytoscape, the user may add custom Cytoscape.JS events to the exported webpage. In the web_session/scripts directory, a custom.js file has been added with a designated spot for custom JS code.
For example, to add linkouts to nodes in the webpage (i.e. opening a URL specified by the “href” node attribute when the user clicks the node), the custom.js file should look like:
// Notice that the `cy` object may only be referenced
// after the document has finished loading.

$( document ).ready(function(){
  cy.on('tap', 'node', function(){
    try { // your browser may block popups
      window.open( this.data('href') );
    } catch(e){ // fall back on url change
      window.location.href = this.data('href');
    }
  });
});
This change has to be made each time you export a web page. If you want to change the default export template, refer to the next section.
Customize Export Template (For Web Application Developers)
The code generated by Cytoscape for the Full Web Application and the Simple Network View web applications is minimalistic. While you can directly modify this code yourself to create your own page design or add new features, the modifications will apply to a single exported network. If you are a web application developer, you can change the application code generated for all exports by editing HTML5 template code resource files in your ~/CytoscapeConfiguration/web directory:
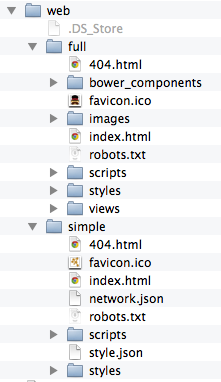
In this folder, you can find full and simple sub directories corresponding to Full Web Application and the Simple Network View described above.
Full Export Template
This is an AngularJS based web application built with grunt (at least for now – we have plans to migrate to gulp). Source code and more documentations are available here:
* https://github.com/idekerlab/cyjs-full-export
To build the project into dist directory, type:
grunt
Simple Export Template
This template is generated by a simple gulp project. The source code is available here:
To build the project into dist directory, type:
gulp
Use Your Custom Templates for Export
Once you have your own builds, you can deploy your templates by replacing the contents of full and simple with your own builds.